Editing the settings for your Glossary will allow you to control how your Glossary functions, and how your students are able to interact with it. A brief explanation of the settings unique to the Glossary activity is included below. For full details, access the Moodle 3.9 documentation on Glossary settings.
General
Is this glossary global - Do NOT use this setting
As indicated, do not use this setting.
Glossary type
There are two types of Glossary: Main and Secondary. There can only be one Main Glossary in a LEO unit, but there can be multiple secondary Glossaries. Entries from secondary glossaries can be imported into a Main Glossary. Both main and scondary Glossaries function in the same way.
Entries
Approved by default
If you select 'Yes' from the dropdown, then a member of the teaching staff will need to 'approve' an entry before it is published in the Glossary.
Always allow editing
Selecting 'Yes' from the dropdown means that you and your students will be able to edit their Glossary entries at any time. Selecting 'No' from the dropdown will mean that you can only edit a Glossary entry within a certain timeframe after publishing it.
Duplicate entries allowed
If 'Yes' is selected from the dropdown, then multiple Glossary entries can have the same name.
Allow comments on entries
If 'Yes' is selected from the dropdown, then all users within the LEO unit will be able to add comments to Glossary entries.
Automatically link glossary entries
If site-wide auto-linking has been enabled, then every time you or your students add an entry to the Glossary, you will have the option to automatically link to the entry whenever the word or phrase appears throughout the rest of your unit.
Appearance
Display format
There are seven display options available for you to select from in the dropdown menu. These include:
- Simple, dictionary style - Authors are hidden and attachments will be shown as links.
- Continuous without author - Entries are displayed one after another with no separation.
- Full with author - Entries are displayed in a forum-like format, showing the author's data. Attachments are shown as links.
- Full without author - Entries are displayed in a forum-like format. Authors are not displayed and attachments are shown as links.
- Encyclopedia - Displays the same as 'Full with author' but attached images are shown inline
- Entry list - Concepts are listed as links
- FAQ - The words 'concept' is replaced with 'QUESTION' and the word 'definition' is replaced with 'ANSWER' in the Glossary entries.
Approval display format
There are eight approval display format options available for you to select from the dropdown menu. These are the same as the options available under 'Display format'. You may like to select a different display format for when you approve Glossary entries, or you can select 'Default to same as display format'.
Entries shown per page
You can enter any number here, but it is recommended that you put a number less than 10. The number you enter will dictate how many entries are visible per page of your Glossary.
Show alphabet links
If you select 'Yes' from the dropdown menu, you and your students will be able to browse the Glossary by letters of the alphabet.
Show 'ALL' link
If you select 'Yes' from the dropdown menu, you and your students will be able to browse all entries at once.
Show 'Special' link
If you select 'Yes' from the dropdown menu, you and your students will be able to search the Glossary by special charters such as # and @.
Allow print view
If you select 'Yes' from the dropdown menu, your students will be provided with a link to a printer-friendly version of the Glossary entry. This printer-friendly link is always available to unit coordinators and teaching staff, regardless of the option you select.
Ratings
Aggregate type
The aggregate type defines how ratings are combined to form the final grade which will appear in the Gradebook. In the dropdown menu your options are:
- Average of ratings - The grade given will be the mean of all ratings given to entries
- Count of ratings - The number of rated items becomes the final grade. NOTE: the total cannot exceed the maximum grade for the activity.
- Maximum - The highest rating given to any one entry becomes the final grade
- Minimum - The lowest rating given to any one entry becomes the final grade
- Sum - All ratings given to all entries are added together. NOTE: the total cannot exceed the maximum grade for the activity.
If "No ratings" is selected from the dropdown menu, then your Glossary will not appear in the gradebook.
Scale
Select the type of grading used for this activity. If 'scale' is chosen, you can then choose the type of scale from the dropdown menu. If you select 'Point' from the dropdown menu, then you can then enter the maximum points you want to assign to your Glossary activity.

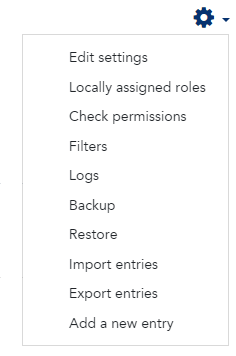 When you are inside the Glossary activity, you can click the Cog icon to access the Tool Administration menu. From here you can: