Every LEO unit is broken up into sections. Depending on your unit settings, these may be displayed to users as Tiles, where each section is separately displayed once the tile is clicked, or stacked on top of each other, as in the Topics or Collapsed Topics format.

Usually, the first few sections will be material about the unit as a whole, such as Overview, Communication or Assessment. After these general information sections, the unit will usually be broken up into sections based on topics or weeks.

Note: Your faculty may have a preferred format and order of sections that you will be required to use in your unit.

You can modify the unit format in the Unit Settings.

Tile format sections

In this Tiles format, each section is presented as a clickable image. Clicking on a tile opens up a page containing the content for that section. Clicking on the All sections tile opens up a screen listing the content of all sections:

Tile format example

Modules and Collapsed Topics formats

In the Modules format, sections are listed one after another. The Collapsed Topics format is similar, however these sections are collapsible (and can be expanded or hidden by the user):

Example of stacked topics format

You can change the unit format by clicking the Cog icon on the home page of your unit to open the Unit Administration menu and clicking the Edit settings option.

You should use the format required by your faculty, which is often set by the template you're using, or from the unit that was rolled over.

Changing the format of a unit is outlined in the LEO Guides: Unit Settings.

To begin editing your unit headings and activity or resource titles, turn editing on by clicking the Turn Editing On button, located at the top right of the screen:

Turn editing on

When you copy an existing unit, it will automatically copy across the labels, content and activities of that unit, however there may be changes you need to make to keep your new unit up to date.

The Edit button

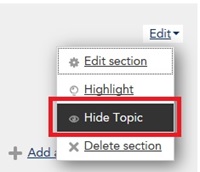
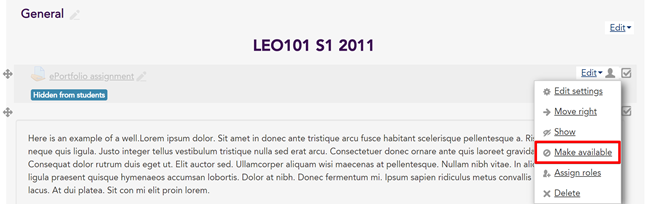
Activities and resources, as well as section titles, can be modified by clicking the edit button for that object:

The edit button

When you click Edit, a dropdown menu will appear, which depending on the type of object, will give you a dropdown of options:

  • Edit Settings will take you to a page to edit all settings associated with that object
  • Hide or Show will make the object invisible or visible to students
  • Move Right or Move Left can be used to indent the object
  • Duplicate can be used to make a copy of the object on the page
  • Delete will allow you to remove the object completely

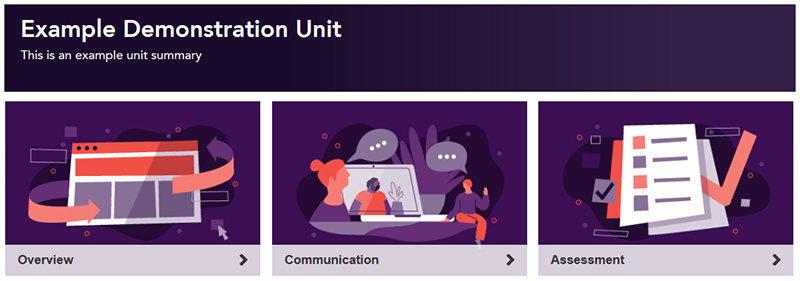
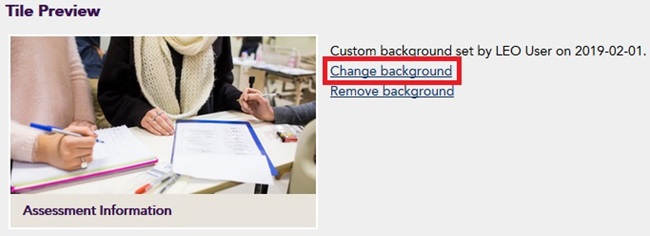
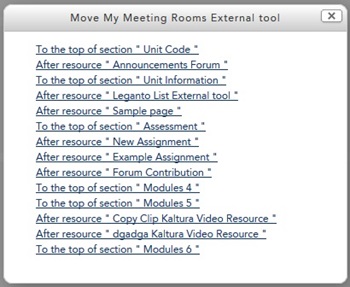
See below for how to change the titles and images of whole sections of your unit.

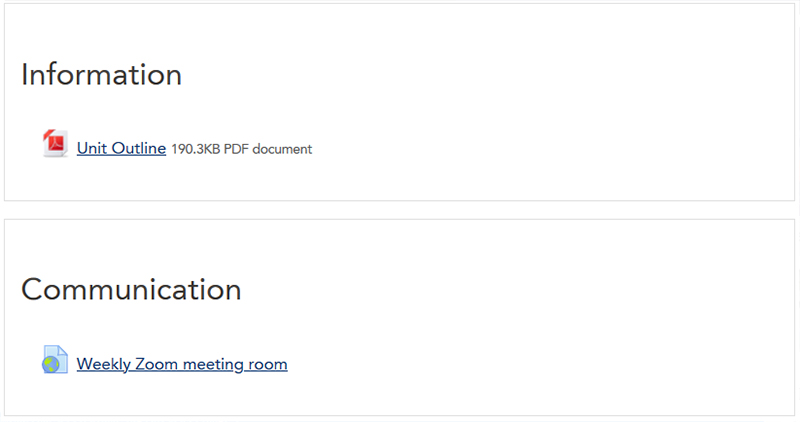
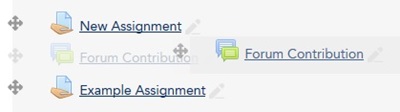
Quickly editing the title of a resource

You can easily change just the name of a resource without have to go to Edit Settings:

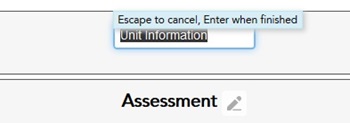
  1. Click the Pencil icon next to the resource name:
    Pencil button
  2. Enter the new name for the resource into the text box that appears.
  3. Click Enter on your keyboard to save the changes.

Note: Section or Topic titles can be edited using the pencil button if your unit is in Modules or Topics format.

Styling your LEO units

It is important to style your LEO units to be coherent and consistent. To help with this, please see the following guides:

To begin editing section titles and tile images, click the Turn Editing On button in the top right of the screen.

How to edit a section title

  1. With editing turned on, click the Edit link at the top right of the section you want to edit, and choose Edit Section (or Edit Topic, if you are using Topics or Modules formats):
    The Edit section option
  2. Change the Section Name field to what you prefer (check the Custom box to override the default value if you need to):
    The section name setting
  3. Click the Save changes button. You should return to the unit, where the section name has been updated.

NOTE: In Topics or Modules format, you can edit the section title directly by clicking on the title text directly, modifying the text, and pressing :
Directly editing the topic title

How to change a tile image

  1. At the bottom of the section where the Tile preview is shown, click the Change background link (or Set background, if there is currently no image):
    Change background option for tile
  2. Remove the current image by clicking the image icon in the Files window and choosing Delete.
  3. Use the Add File button and the Upload File option to upload a new image for the tile from you computer.
  4. Click the Use button to save the new image.

Note: if you cannot see the option to change the image, these may be set by your faculty and are unable to be changed, or you do not have the required role to change them. Please speak to your supervisor about getting access to change these images.

With editing on, each section can be moved and repositioned in the structure of your unit using the Move handle:

movebutton

Click and drag option

The Move handle can be use to click and drag a section to somewhere else in the structure of sections.

  1. With your mouse, click and hold on the Move handle for the section you wish to move
  2. Drag your mouse to in-between the sections where you want the section to be
  3. Release your mouse, and the section will move to the new place.

Click and select option

In larger units, clicking and dragging may be too difficult to do. Instead, you can:

  1. Click the Move handle once
  2. A list of unit sections will appear in a pop-up window.
  3. Click the name of the section you want your moved section to appear under.

The page will update and the section will move to the new location.

Activities and resources can easily be reordered and restructured within each section using the Move handle:

Move handle for resources

Click and drag option

  1. With your mouse, click and hold the Move handle for the resource you wish to move
  2. Drag the resource to the place in in the list of activities and resources where you wish it to be placed:
    The resource being dragged to new position
  3. Release your mouse, and the resource will update and will appear in this new location.

Note: you can re-position resources inside a section, or drag resources into new sections using the Click and Drag option.

Click and select new position

  1. Click the Move handle for the resource you wish to move
  2. A list of possible places with the unit will appear for you to choose from, for example:
    List of unit resources
  3. Click the link that best describes where you want the resource to appear, and this resource will move to its new location.

Note: in units with a large number of resources, it may be difficult to properly discern where to place your resource from this list. In these cases, try using the Click and Drag option instead.

Hiding and showing a section

Sections can be hidden from students until you are ready for them to access it:

  1. With editing turned on, click the 'Edit' button for the section you wish to hide.
  2. From the drop-down menu, choose 'Hide Topic':
    The Hide Topic option
  3. This section will now be hidden to students.

You can show the topic again later by choosing 'Show Topic' from the 'Edit' menu.

Note: Whether the student can see the topic as "greyed-out", or if it is completely invisible to them, is determined by the "Hidden Sections" option under the "Unit Format" section of your unit settings.

Restricting access to a section

You can also make a section only visible to students who meet certain criteria, such as being part of a specific group, or only after completing a specific activity:

  1. Edit the settings for the section you wish to restrict access to.
  2. Scroll down and set your conditions under the "Restrict Access" options of the section settings page.

For more information on restrictions, see the Hiding and restricting access page of the LEO Guides.

You can put an activity or resource into 'stealth mode' to hide it on the unit page while at the same time making it available to students. This new feature can be helpful when embedding activities such as assignments and quizzes into a page, book, or lesson.

Make available option

Refer to 'stealth activities' in the MoodleDocs for more information.

Adding sections

Adding additional sections is discussed in the unit settings page. Simply increase the number next to the 'Number of sections' setting. New sections will appear at the end of the list of sections, and you can then reorder and rename the sections if necessary.

Deleting sections

If you reduce the number of section in the unit settings, any sections at the bottom of the page will be "left off".

However, you can specifically delete sections yourself:

  1. Click the 'Edit' option for the section you wish to delete.
  2. Choose the 'Delete' option and confirm deletion of the section.

Note: activities and resources in deleted sections will also be removed from your unit.

Page last updated on 18/03/2021

Service Central

Visit Service Central to access Corporate Services.


Other service contacts


Learning and Teaching
Library
Request Something

Make a request for services provided by Corporate Services.


Request something
Knowledge base

Find answers to frequently asked questions 24/7.


See Knowledge Base