A group is a collection of enrolled users within a LEO unit. To make groups in your unit you can:

  • Manually create groups (either one at a time or using the auto-create function) and putting the students in groups yourself.
  • Import groups from another LEO unit or from Tutorial Direct (Allocate).
  • Create signup groups (allowing students choose their own group).

Note: Banner groups are automatically created in your LEO unit when the unit is linked to a specific student cohort during the unit creation process.

How to manually create groups

To make your own manual groups in your unit:

  1. Navigate to your unit in LEO, then click the Participants link in the unit menu in the Navigation panel:
    The unit Participants link
  2. Click the Cog icon on the Participants page and choose Groups from the dropdown menu:
    The groups menu from Participants page
  3. Click on the blue Create group button.
  4. On the Create group screen, give your group a name and a description (optional). You are also able to upload an image to represent the group if you wish.
  5. Click Save changes when you are done.

Repeat from step 3 until you have created all of the groups you require.

You can manually add or remove enrolled users to a group using the Add/Remove Users function.

  1. Navigate to your unit in LEO.
  2. Click the Participants link in the unit menu in the Navigation menu:
    The unit Participants link
  3. Click the Cog icon on the Participants page and choose Groups from the dropdown menu:
    The groups menu from Participants page
  4. Select a group you've created from the Groups column on the left. When you select a group, a list of current members will appear in a column on the right.
  5. Click the Add/remove users button under the list of group members.

On the Add/remove Users screen there will be two columns. Group members (left) lists existing members of the group, and Potential members (right) lists other users in the unit that you may add to this group.

  • To add a user to the group, select the user from the list of potential members on the right and click the Add button. You can also search for potential members by typing into the Search box, which will automatically filter for matching users as you type:
    Add remove groups panel
  • To remove a user from the group, select the user from the list of group members on the left and click the Remove button.
  1. Click the Back to groups button at the bottom of the screen to return to the Groups page.

You can use the auto-create groups function to make groups and distribute students evenly across these groups. The options and settings for this functionality may be confusing at first, however the feature includes the ability to preview your new groups before creating them.

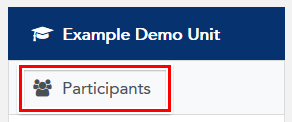
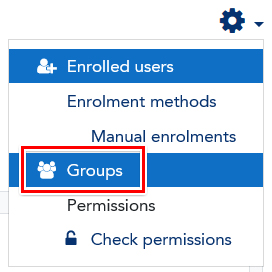
  1. Navigate to the unit groups page through Participants > Cog icon > Groups as described above.
  2. Click the Auto-create groups button.

Auto-create groups settings

The auto-create function has several settings you can use to create groups:

General section

  • Naming Scheme: your new groups will be named sequentially based on this setting. For example, "Tutorial Group 1, Tutorial Group 2, etc." for as many groups as are created. Use a "@" symbol to name them "Group A, Group B, Group C, etc." or a "#" symbol to name them "Group 1, Group 2, Group 3, etc.".
  • Auto-create based on: you can choose to create a set number of groups, or as many groups as are required based on how many users should be in each group.
  • Group/member count: if you've chosen to auto-create based on groups, this setting determines the exact number of groups to be created. Otherwise, it will determine how many users are put into each group.

Group members section

  • The first three settings allow you to choose the role of the users to be put into groups (such as Students), and choose only users currently in a specific group or grouping.
  • Allocate members: allows you to choose the order in which users are added to groups.
  • Prevent last small group: if creating groups based on "members per group", enabling this setting will prevent a group with less than the required members from being created. Instead, "leftover" users will be added to other groups.
  • Ignore users in groups: This may be useful if you want to "round up" students who don't already exist in any group in the unit.

Grouping

  • These settings allow you to automatically add your new groups to an existing grouping, no grouping, or a new grouping can be created for these new groups.

Preview and create

  1. Customise your settings as required, then click the Preview button. A preview of groups that will be created, and the members assigned to each, will be displayed below. If the preview is not showing what you intended, you may adjust the settings and click the Preview button again.
  2. When the preview shows the groups as you want them, click the Submit button.

The groups (and new grouping, if you opted to create one) will be created, and you will be returned to the groups page, where your new groups will appear in the Existing groups panel.

Page last updated on 02/09/2021

Service Central

Visit Service Central to access Corporate Services.


Other service contacts


Learning and Teaching
Library
Request Something

Make a request for services provided by Corporate Services.


Request something
Knowledge base

Find answers to frequently asked questions 24/7.


See Knowledge Base