View the above video Marking and providing feedback in Turnitin in Echo360.


Managing the Turnitin submissions inbox

The Turnitin submissions inbox allows you to access student submissions for grading, sort and filter submissions, as well as a range of other useful functions.

Click the Turnitin Assignment activity in your LEO unit to view the list of submissions in the inbox: 

tii-submissionlisting

For each submission you can:

  • Click the Submission Title, Similarity Percentage or Pencil icon to open it in Feedback Studio.
  • Click the Cloud icon to submit an assignment on behalf of the student (not a recommended function).
  • Click Down Arrow icon to download a copy of the submitted file.
  • Click the Refresh icon to update the similarity score or grade column.
  • Click the Trash Can icon to remove the assignment submission. Note: this does not remove the submission from the Turnitin database.

Notifying Non-Submitters

NOTE: Due to technical issues with the Turnitin plugin, the 'Notify non-submitters' option has been disabled in the Turnitin submission inbox  This feature allowed lecturers/markers to send a message to students who had not submitted by the due date.

To remind your students about upcoming assignment deadline, we recommend using the Announcements forum, sending LEO messages, or emailing your students directly.

To learn more about how to manage and navigate the submission inbox, see the topics below.

Turnitin IOS app

For more information about the Turnitin iPad, refer to Turnitin page and accordion Turnitin IOS app.

Filtering the list of submissions

Showing all submissions

Show entries option

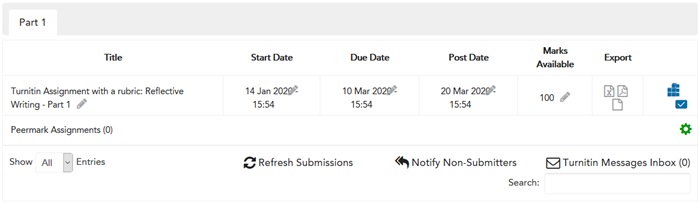
By default, only the first 10 students are listed on each page, with Next Page and Previous Page buttons located above and below the list of submissions. To view more students, click on 'Show' and select the number students per page that you wish to see (such as 100). Note: showing All is not recommended when dealing with large cohorts of students, as it may cause loading issues.

Filtering by Group

Separate groups dropdown box

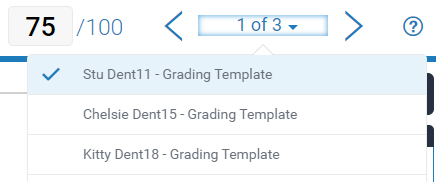
If your unit uses groups and the Turnitin assignment is using the separate groups setting, you may need to switch between groups of students using the Separate Groups dropdown box above the submission inbox (see image right).

Search by student name

Inbox search function

You can use the Search option to find a specific student in the submissions inbox. Type the first or last name into the search field, and the submissions list will automatically filter as you type.

Sorting the list of submissions

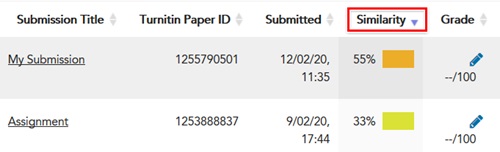
By default, the list of student submissions is sorted alphabetically by last name. You can use the sorting options next to each column to sort the list of submissions in ascending or descending order for that column.

For example, if you want to see the highest Similarity scores at the top, click the Similarity column heading once to sort ascending (smallest to largest) and then again to sort descending (largest to smallest):

The inbox sorted by similarity

The submissions inbox also allows you view and edit the details of the Turnitin Assignment activity:

Submissions inbox information
  • The Pencil icon in the Title, Start Date, Due Date, Post Date, Marks Available fields enables you to quickly edit that field (Editing Lecturer role only).
  • The blue Rubric icon allows you to open the Rubric Manager for export/import functions. To view the attached rubric or grading form, switch your role to Student first.
  • The Refresh Submissions link updates the Similarity and Grade columns for all submissions.
  • The Notify Non-Submitters allows you to send a reminder to all students who have not yet submitted.
  • The Excel Document icon under the Export column allows you to generate list of all submissions and overall student grades.
  • The PDF Document icon and Blank Document icon under the Export column allows you to export all original submissions, however these functions are not recommended for use, as they may create loading issues.

Note: these functions require you to have an Editing Lecturer role in the LEO unit.

Student and Tutors tabs in the Submission Inbox (are not required)

Students and tutors are automatically linked to the Turnitin assignment when they click on the Turnitin assignment located in the unit. It is NOT necessary to click on the Turnitin tutors or Turnitin students tabs for any further action.

Intermittent issues with Feedback Studio freezing

Occasionally, Turnitin Feedback Studio can freeze, meaning users are unable to:

  • Save comments.
  • Open previously saved comments.
  • Record audio.

The intermittent nature of problem makes it very difficult to diagnose. Freezing can be more likely when marking in a unit with large cohort of students e.g. 400 or more. Using the filter options to reduce the number of students displayed in the submission inbox may help. Also, if you are adding comments, click off the element you are current editing and wait for it to automatically save before adding more comments.

If you experience this issue, please try:

  • Closing the current submission and opening it again.
  • Filter the list of submission for using separate groups.
  • Update your web browser or try using a different one.
  • Switching to Turnitin Classic view:
    Turnitin Classic view

If the issue is ongoing, please contact LEO support.

When opening a student submission, it displays an M14.11 error

This error indicates that the submission was unable to be converted by Turnitin to accurately generate a report of text matches:

Turnitin submission M14 error message

In these cases, the fastest approach to dealing with this issue is:

  • Before the submission deadline: ask the student to remove any problematic elements (see below) and resubmit their assignment.
  • After the submission deadline: Remove the student's submission using the Trash Can button, then request the student fix and re-upload the assignment.

A submission may cause an error with Turnitin if:

  • It contains complex content such as images which take too long to process. To work around this issue the student is advised to replace any vector images (Examples of Vector graphics are: AI, EPS, WMF and PICT (Mac)) in their paper with images (jpg/jpeg, psd, png, tiff, bmp and gif).
  • It uses a PowerPoint template that includes vector images or text in dialogue boxes. To work around this the student is advised to change image files or convert their PPT to PDF if text in dialogue boxes are included.
  • The paper has been converted using a third-party PDF converter.
  • The first page of a paper includes an image without text, the processing is sometimes aborted which makes the paper inaccessible.
  • The file includes text with visual effects such as 3D glow or shadow or animations.
  • The file is password protected.

How to mark submissions

Feedback Studio enables staff to mark student submissions with a numeric score, which is also visible in Gradebook once the post date has passed.

To input a mark for the submission manually:

  1. Click the Turnitin Assignment link in your LEO unit.
  2. Find the submission you want to grade and click the title of the submission to open Feedback Studio in a new tab:
     The submission title in the turnitin inbox
  3. At the top of Feedback Studio, enter a numeric score into the Overall Grade field:
     Inputting a number in the overall grade box
  4. Click off the grade field (i.e. anywhere else on the page) to deselect it. This will trigger the grade to automatically save.

When you close Feedback Studio tab and return to the list of submissions, it will reload and update the grade column with any changes you have made.

How to provide feedback on submissions

When you open a submission in Feedback Studio, the blue Instructor Feedback panel on the right is collapsed by default.

Click these buttons to open the panel to begin adding your feedback:

  • QuickMarks and Comments 
  • Overall Feedback 
  • Rubrics and Grading Forms 

See the topics below to learn how to use each of these feedback options.

View the above video Working with Turnitin QuickMarks on Echo360.

An example of a QuickMark
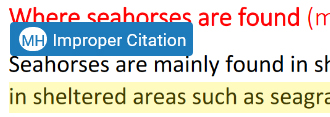
QuickMarks are frequently used comments that can be used to quickly provide feedback to students. They can be placed anywhere on the submission assignment for students to read.

To add a QuickMark:

  1. Select the QuickMarks button tiiquickmarkicon in the menu to activate the feedback layer.
  2. Click once directly on the assignment, or highlight a selection of text, where you want the QuickMark to appear.
  3. Click the QuickMark icon from the pop-up menu:
    The Quickmark Icon
  4. Select any of the QuickMarks from the available options to add it to the page. You may also add additional comments.
  5. Click off the pop-up (click anywhere else on the assignment) to close the pop-up and save the QuickMark.

QuickMarks can be edited at any time by selecting it on the page, making your changes, then clicking off it again.

To delete a QuickMark, select it and click the Trash icon.

There are several sets of QuickMarks to choose from, the default being the Commonly Used set. You can click the dropdown box to select another set.

An example of a custom comment
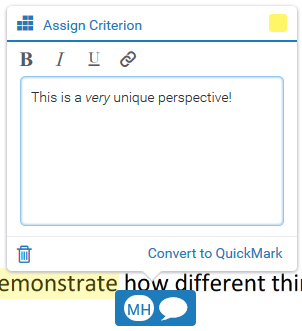
A Comment allows you to quickly add annotations anywhere on the assignment.

To add a Comment:

  1. Select the QuickMarks button tiiquickmarkicon in the menu on the right activate the layer.
  2. Click once anywhere on the assignment, or highlight a select of text, where you want the comment to appear.
  3. Click the Comment icon from the pop-up menu:
    The comment option
  4. Type your comment into the Add Comment box.
  5. Click off the pop-up (anywhere else on the assignment) to save the comment and close the panel.

Comments can be edited at any time by selecting the comment on the page, making your changes, and clicking off it again.

To delete a comment, select it and click the Trash icon.

Inline comments

The third option in the popup menu is the Inline option (the "T" symbol). This can be used to write directly onto the page. This is less commonly used as it can make the assignment appear cluttered and less readable for students.

Overall feedback is used for providing general comments regarding the whole submission. Overall feedback can be either text or audio (voice).

Example of the text comments box
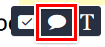
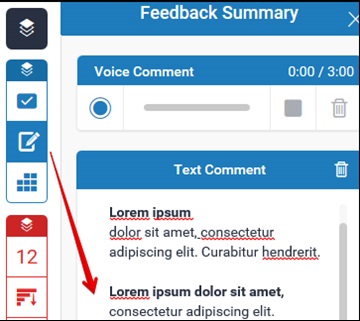
To add overall feedback as text:

  1. Select on the Feedback Summary button tiioverallfeedbackiconin the menu on the right.
  2. Click in the box marked Text Comment and type in your feedback.
  3. Click off the comments box (click anywhere else on the page) to deselect it and it will be saved automatically.

The Text Comment can accept up to 5000 characters. You can also paste text from other programs into the box if you wish, though it may require you to fix up any formatting issues.

To add overall feedback as audio:

A voice comment can record up to 3 minutes of audio per comment. You will need to allow your web browser to access your microphone when prompted.

  1. The Voice Comment panel
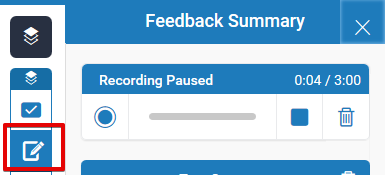
In the Voice Comment panel, click the Record button to start recording your voice.
  2. When finished, click the Stop button.
  3. Review the recording before saving by selecting the Play button
  4. When you are happy with the recording select the Save icon. If you want to record the comment again, click the Trash button to delete the current recording. 

If your Turnitin Assignment has a rubric or grading form attached to it, you can mark the rubric inside Feedback Studio. Students will then be able to see the results of the rubric when reviewing their feedback.

A rubric or grading form may be qualitative (not used to calculate a final grade) or quantitative (scores may calculated and applied to the overall grade field).

A Rubric sliders example
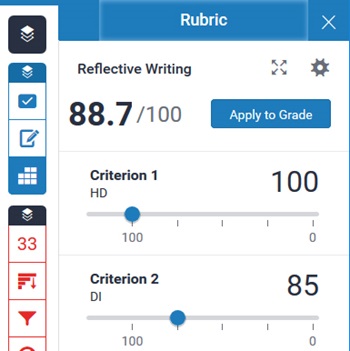
How to mark the rubric

  1. Select on the Rubric/Form button tii-rubricicon in the menu on the right.
  2. Mark each of the criterion in your rubric by either:
    1. Using the slider bars to select a score for each criterion in your rubric.
    2. Click the expand button tii-fullsizerubric to open the rubric in a new window. In this expanded view, you may click the appropriate box for each criterion to indicate the score.
  3. Changes are saved automatically as you adjust the sliders, or when you close the expanded window.

Calculating grades

If your rubric is quantitative, you will see the calculated final grade displayed above the sliders (see image right) or at the bottom of the expanded view window. When ready, you can click the Apply to Grade button to copy this score into the Overall Grade box at the top of the screen.

You can also click the expand button tii-fullsizerubric to open the rubric in a new window, which may give you a more comprehensive view of the rubric criteria and scales.

Grading form example
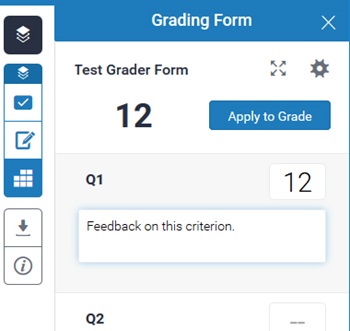
How to mark a grading form

  1. Select on the Rubric/Form button tii-rubricicon in the menu on the right.
  2. For each criterion, enter a numeric grade and your feedback in each box (see image right).
  3. Click the Apply to Grade button to calculate the total score and copy it to the Overall Grade box at the top of the screen.

You can also click the expand button tii-fullsizerubric to open the grading form in a new window, which may give more room to enter feedback.

When you've finished providing a grade and any feedback on a submission, you can close the browser tab to return to the list of student submissions and open another assignment.

Alternatively, you can use the Next and Previous buttons at the top right of the screen to move between submissions without closing Feedback Studio, or choose a specific one by clicking the the dropdown box and choosing one from the list:

 Navigating between submission in Feedback studio

Note: If you have used a filter in the submission inbox, the next and previous buttons will display all students enrolled in the unit alphabetically by last name.

When marking assignments in units with large cohorts of students, it is best to use the filter options to refine the list of students and open and mark each submission individually. This can help avoid intermittent freezing issues (see Common Errors section below for more information).

Page last updated on 09/05/2023

Service Central

Visit Service Central to access Corporate Services.


Other service contacts


Learning and Teaching
Library
Request Something

Make a request for services provided by Corporate Services.


Request something
Knowledge base

Find answers to frequently asked questions 24/7.


See Knowledge Base