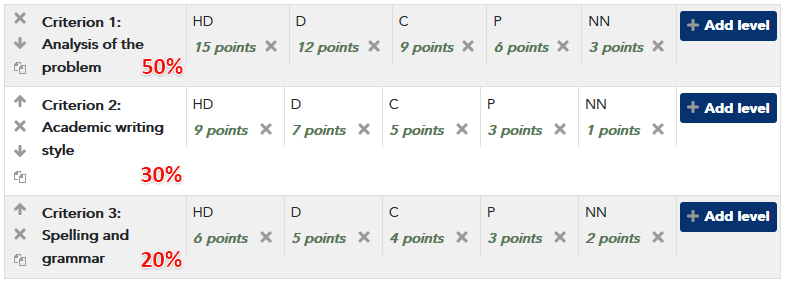
At ACU assessment marking and grading is criterion-referenced and uses standard-based grading. (Assessment Policy, 5.1)
Criterion referenced assessments allow you to identify that a student has achieved the learning outcomes for an assessment task and how well. The level or standard of how well students achieve the learning outcomes is preset according to defined criteria.
The criteria are often set out in a rubric which not only communicates standards but provides vital feedback to students regarding their performance.
This LEO guide focuses on the technical aspects of setting up a rubric in LEO Assignment, and does not cover how to create a pedagogically valuable rubric. See ‘Resources’ section for further suggestions for writing rubrics.
Rubric vs marking guide
Depending your preference, another option is to use a marking guide.
|
Rubric
|
Marking guide
|
| Format |
Matrix
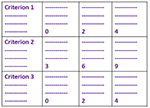 |
List
 |
|
Standards based grading
|
Yes
|
Yes
|
|
Scale - standards of different levels of achievement within a criteria are specified
|
Yes
|
No
|
|
Marks
|
Can give pre-set marks according to level
|
Can give a mark up to a specified maximum
|
|
Ability to provide advice for markers per criterion
|
No
|
Yes
|
|
Ability to create bank of ‘Frequently used comments’
|
No
|
Yes
|
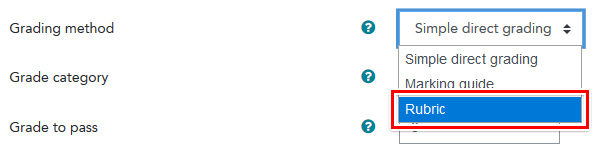
Enabling a rubric
There are two ways to add a rubric to Assignment, which are explained in the sections below:
- Method 1 – add a Rubric in the Assignment settings
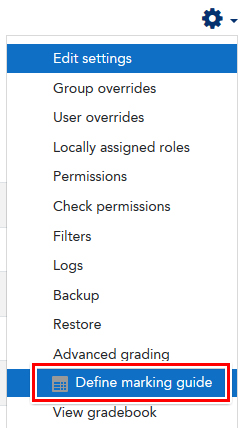
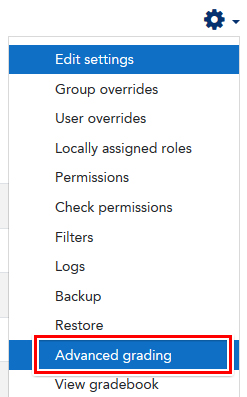
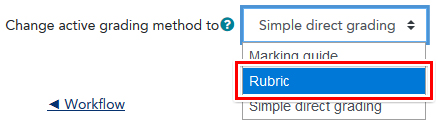
- Method 2 – add a Rubric using the Advanced Grading option